2022年12月30日 星期五

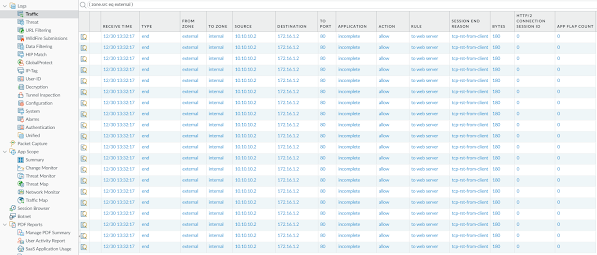
PaloAlto VM DoS Protection Lab

  •  網路架構圖


  • 環境
    • PaloAlto VM
      • OS : PA-VM-KVM-10.0.11-h1.qcow2
      • Management IP : 192.168.1.2
    • Victum
      • OS : Windows 10
      • IP : 172.16.1.2/24
      • Gateway : 172.16.1.1
      • apache web server
    • Attacker
      • OS : Kali Linux
      • IP : 10.10.10.2/24
      • Gateway : 10.10.10.1
  • PaloAlto DoS Protection Prolfile


  • PaloAlto DoS Protection Policy


  • 攻擊示範
    • TCP SYN Flooding

    • Resources Protection(Maximum Concurrent Sessions Limit)


2022年9月17日 星期六

Ubuntu 20.04安裝OpenVPN + Windows AD認證整合

  • Ubuntu 20.04透過自動腳本安裝OpenVPN Server

curl -O https://raw.githubusercontent.com/angristan/openvpn-install/master/openvpn-install.sh

chmod +x openvpn-install.sh

執行自動腳本,安裝過程會產生OpenVPN客戶端配置文件,、。

./openvpn-install.sh

設定開機自動執行OpenVPN Server

sudo systemctl enable openvpn

sudo systemctl status openvpn

sudo systemctl restart openvpn

sudo systemctl start openvpn

sudo systemctl stop openvpn

參考:https://2error.net/zh-hant/%E5%A6%82%E4%BD%95%E5%9C%A8-ubuntu-20-04-%E4%B8%AD%E5%AE%89%E8%A3%9D-openvpn

於Windows 10客戶端上安裝OpenVPN客戶端Community Edition

匯入OpenVPN客戶端配置文件即可連線成功

  • OpenVPN Server整合Windows AD認證

安裝OpenVPN LDAP package

sudo apt install openvpn-auth-ldap

複製LDAP設定檔

cp -v /usr/share/doc/openvpn-auth-ldap/examples/auth-ldap.conf /etc/openvpn/auth/auth-ldap.conf

修改LDAP設定檔

sudo vi /etc/openvpn/auth/auth-ldap.conf

URL ldap://x.x.x.x

BindDN "CN=openvpn,CN=xxx,DC=xxx,DC=xxx,DC=xxx,DC=xxx,DC=xxx"

Password xxx

TLSEnable no

BaseDN "CN=xxx,DC=xxx,DC=xxx,DC=xxx,DC=xxx,DC=xxx"

SearchFilter "(cn=%u)"

修改OpenVPN伺服器端配置文件

sudo vi /etc/openvpn/server.conf

#user nobody

#group nogroup

push "dhcp-option DNS 140.110.16.1"

push "dhcp-option DNS 140.110.4.1"

push "redirect-gateway def1 bypass-dhcp"

push "route 10.100.0.0 255.255.0.0"

status /var/log/openvpn/status.log

verb 3

#log /var/log/openvpn/openvpn.log

log-append /var/log/openvpn/openvpn.log

plugin /usr/lib/openvpn/openvpn-auth-ldap.so /etc/openvpn/auth/auth-ldap.conf

#client-cert-not-required

client-connect /etc/openvpn/script/connect.sh

client-disconnect /etc/openvpn/script/disconnect.sh

duplicate-cn

修改OpenVPN客戶端配置文件

auth-user-pass

client

proto udp

explicit-exit-notify

ignore-unknown-option block-outside-dns

#setenv opt block-outside-dns # Prevent Windows 10 DNS leak

verb 3

route-nopull

route 10.100.0.0 255.255.0.0 vpn_gateway

參考:https://medium.com/@hiranadikari993/openvpn-active-directory-authentication-726f3bac3546


2022年8月25日 星期四

Zabbix + iPerf整合

  • 安裝好Zabbix agent,並可連線到Zabbix server且運作正常
  • 分別在Zabbix agent及Zabbix server所在的機器上安裝好iPerf3,並設定開機啟動
  • download zabbix-speedtest-lan程式

https://gitlab.mirhosting.com/root/zabbix-iperf 

  • On Zabbix agent, copy the speedtest-lan.sh to /etc/zabbix/script and make executable: chmod +x /etc/zabbix/script/speedtest-lan.sh
  • On Zabbix agent, modify the speedtest-lan.sh
  • On Zabbix agent, copy the speedtest-lan.cron to /etc/cron.d
  • On Zabbix agent, cp speedtest-lan.conf /etc/zabbix/zabbix_agentd.conf.d/
  • On Zabbix agent, restart zabbix-agent: systemctl restart zabbix-agent
  • Import template _speedtest-lan.xml on Zabbix server
  • On Zabbix server, add Zabbix agent to Zabbix server並開始監控

2022年8月7日 星期日

建立自行簽署的SSL憑證,Nginx設定HTTPS + 設定Palo Alto Firewall SSL Inbound Inspection + Enable Anti-Virus/Anti-Spyware

1. 建立自行簽署的SSL憑證,Nginx設定HTTPS

sudo mkdir /etc/nginx/ssl

sudo openssl req -x509 -nodes -days 365 -newkey rsa:2048 -keyout /etc/nginx/ssl/nginx.key -out /etc/nginx/ssl/nginx.crt


sudo vi /etc/nginx/sites-available/default


sudo service nginx restart

2. 設定Palo Alto Firewall SSL Inbound Inspection

sudo mkdir /etc/nginx/ssl/output

openssl pkcs12 -in nginx.crt -inkey nginx.key -export -out output/nginx.pfx -password pass:xxxxxxxx

cd output

openssl pkcs12 -in nginx.pfx -nokeys -password "pass:xxxxxxxx" -out - 2>/dev/null | openssl x509 -out server.crt

openssl pkcs12 -in nginx.pfx -nocerts -password "pass:xxxxxxxx" -out server.key


3. Enable Anti-Virus/Anti-Spyware